
The biner block technique on one rope

The biner block technique on two ropes
Retrievable Rappel with a GriGri
Double Cap
Read Time - 5 minutes
May 2020
Introducing the biner block rappel technique.
The biner block rappel technique is useful in a wide range of scenarios, including rappelling with a damaged line. However, it is most commonly used to rig a retrievable rappel when climbing with an assisted breaking device such as a GriGri.
If you only need to rappel half a rope length or less, then you can rappel with one rope. For this, the set up is as follows.
Step 1: Pass the rope through the rappel materials (maillon, ring, locking biner etc) at the anchor so that both ends reach the ground or the next abseil station. You now have two sides, one on either side of the rappel materials.
If you are not rappelling to the ground clip both ends to yourself with a carabiner and an overhand on bight.
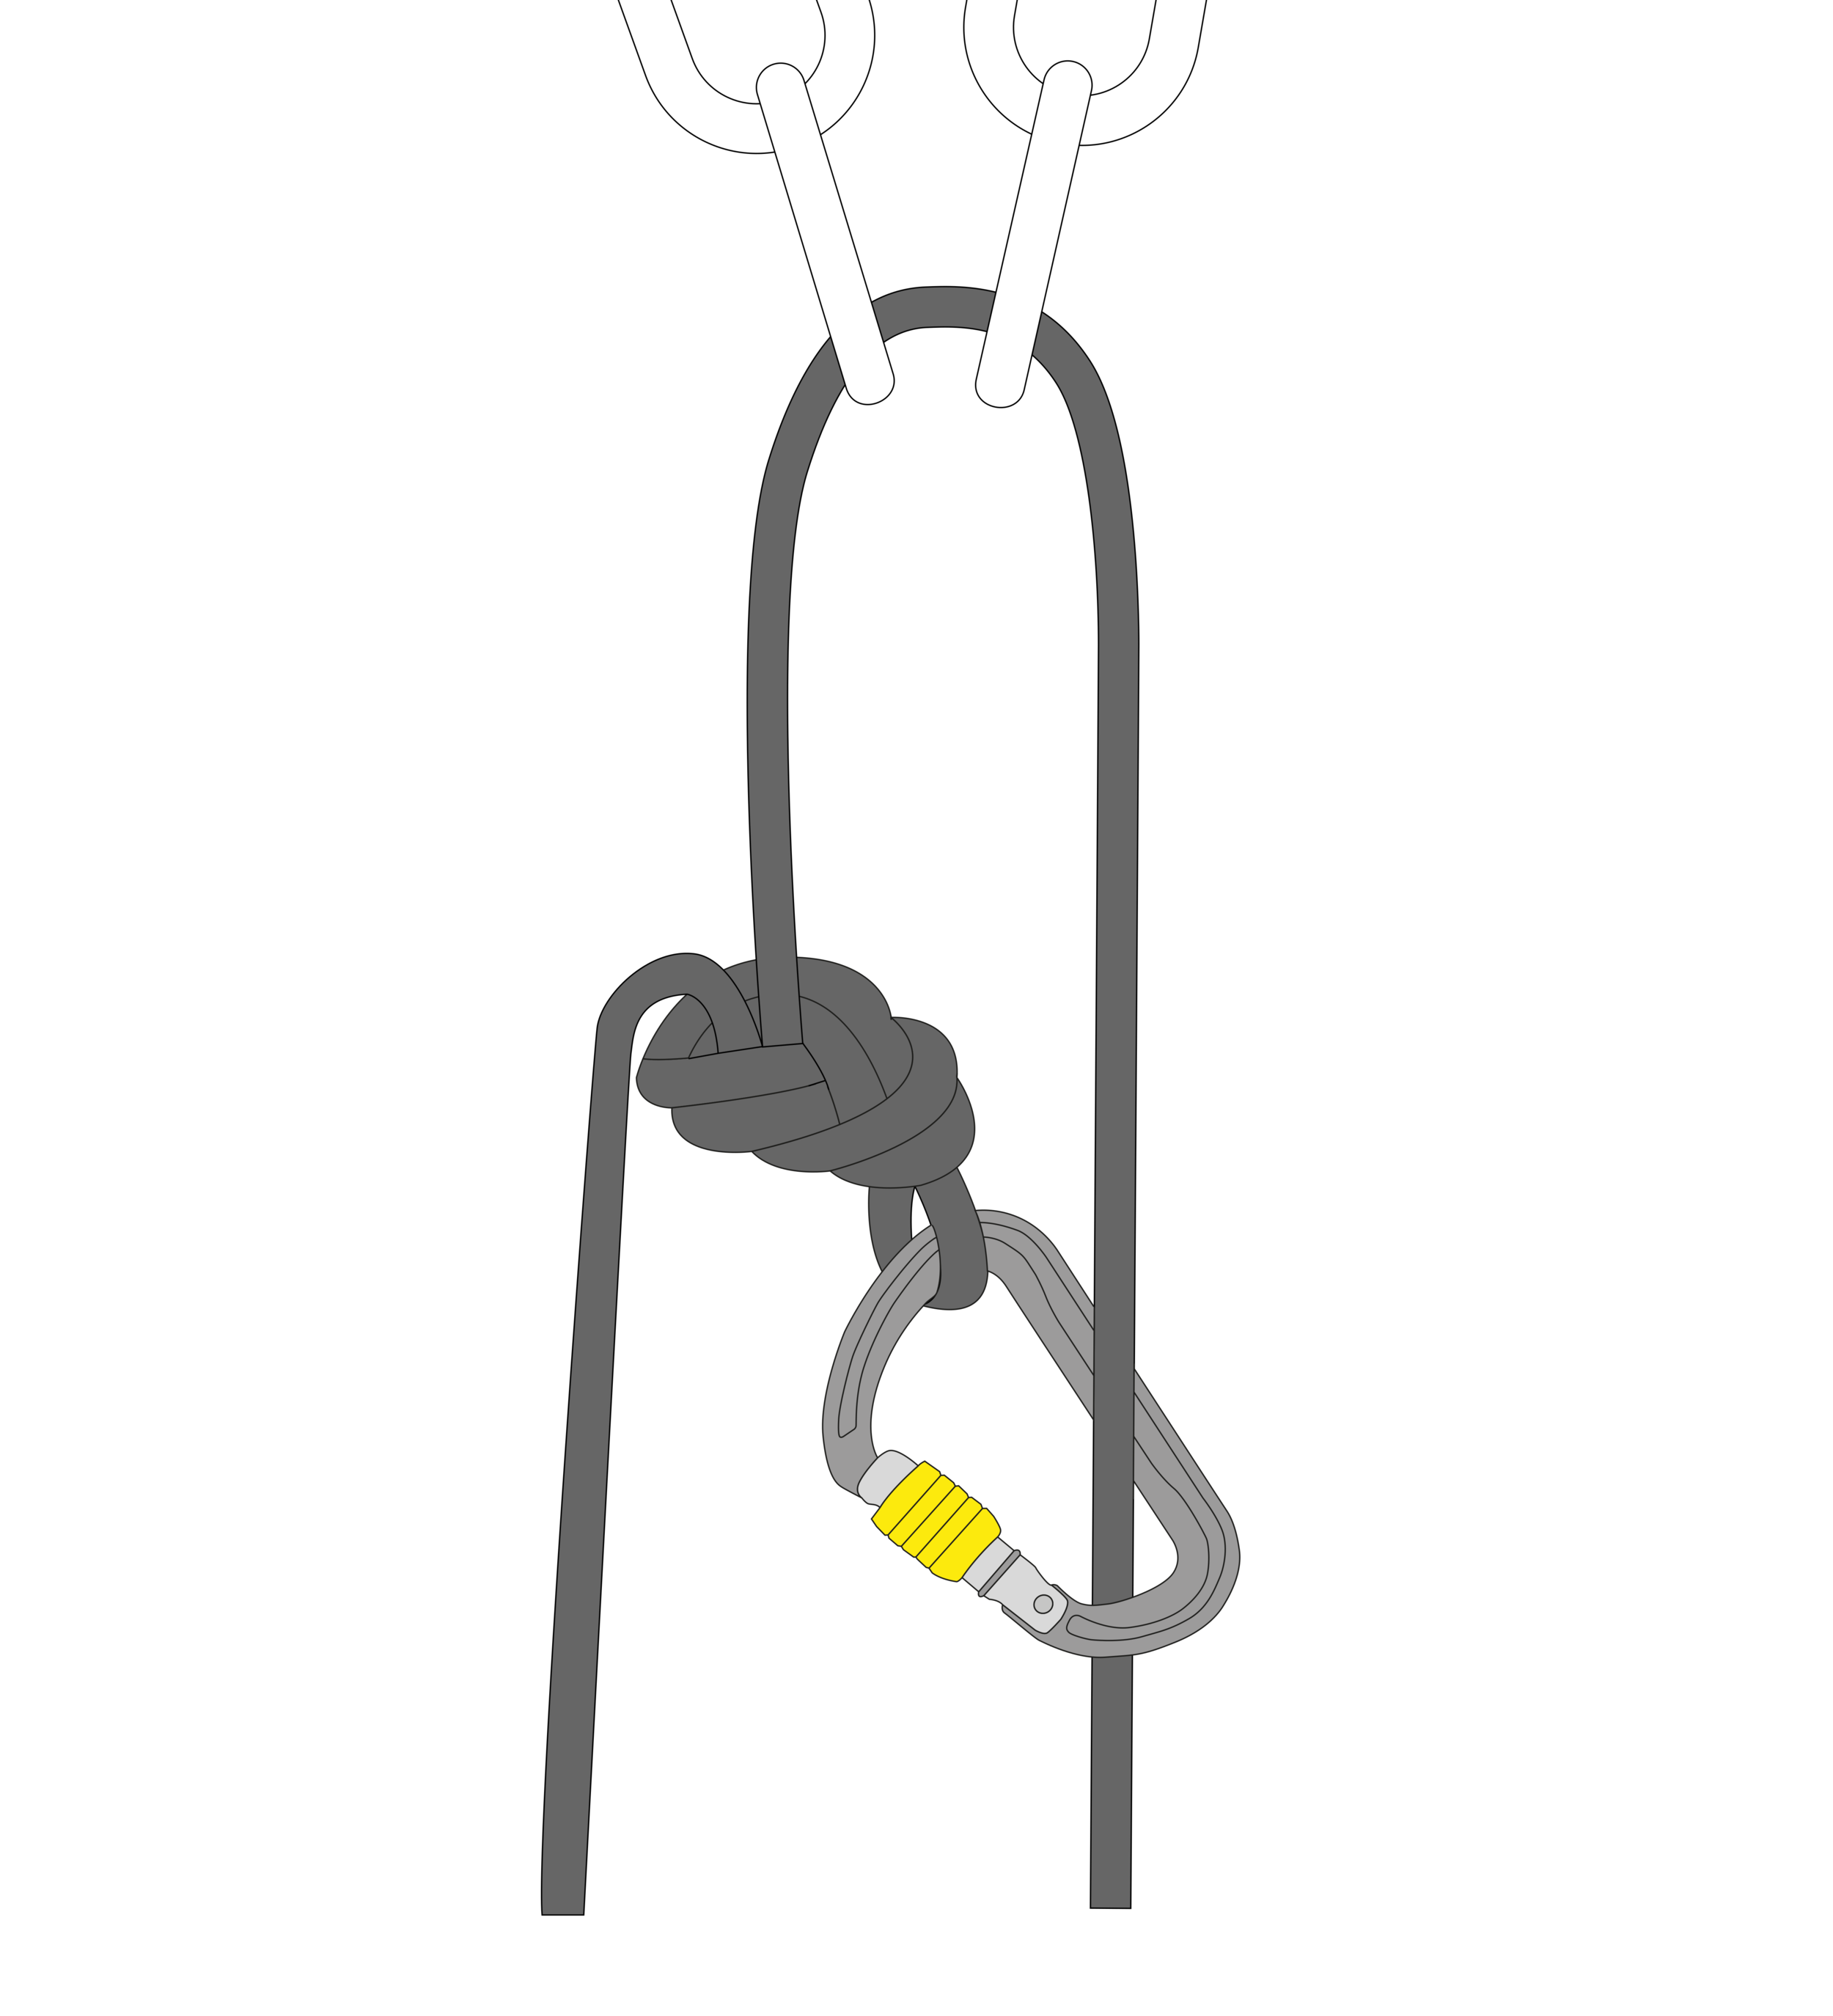
Step 2: On one side of the rope tie a figure eight on a bight, and clip this with a locking carabiner to the other strand. If one side of your rope is damaged you will want to tie the figure eight on this strand.
The figure eight is designed to jam against the rappel materials at the anchor. This is your pull strand. Ensure that the knot is large enough, or that the maillon/ring/carabiner is small enough. Some extremely large HMS carabiners such as Petzl William may allow figure eight on very skinny ropes (<8mm) to pass through with sufficient force.
Step 3: Attach your rappel device to the strand on the other side of the rappel material, such that as you weight this strand, the figure eight jams against the maillon/ring/carabiner.
Step 4: Rappel the length of this strand and safely reach the ground, or the next abseil anchor. Secure the end of the pull strand to yourself or the anchor. Give the pull strand a sharp downward tug to dislodge the jammed knot, and continue to pull the rope down smoothly.
Repat steps 1-4 until the ground is reached.
If you need to rappel more than half a rope length, you will need a second rope. This could be a second dynamic rope or a dedicated pull cord/rap line. For this, the set up is as follows
Step 1: Pass the end of one rope through the rappel materials at the anchor. The end of the rope you pass through will be your rappel strand. So, if one of your ropes is damaged, use the undamaged rope for this.
Step 2: Join the ends of rope X and Y with a flat overhand bend. If you wish, you may back this up with a second stacked flat overhand bend.
The flat overhand bend(s) are designed to jam against the rappel materials at the anchor. The rope which does not pass through the anchor is your pull strand. Ensure that the bends are large enough, or that the maillon/ring/carabiner is small enough. Some old extremely large maillons could, in theory, allow stacked overhand bends on very skinny ropes (<8mm) to pass through with sufficient force. If in doubt, consider using a larger profile bend like a double fishermans’ bend.
If you are not rappelling to the ground clip both ends to yourself with a carabiner and an overhand on bight.
Step 3: On the rappel strand, tie a figure eight on a bight and clip this to your rappel strand with a locking carabiner.
Step 4: Attach your rappel device to the rope on the other side of the rappel material, such that as you weight this rope, the flat overhand(s) jam against the maillon/ring/carabiner.
Step 5: Rappel the length of this strand and safely reach the ground, or the next abseil anchor. Secure the end of the pull strand to yourself or the anchor. Give the pull strand a sharp downward tug to dislodge the jammed knot, and continue to pull the ropes down smoothly.
Repeat steps 1-5 until the ground is reached.
Learnt something? Buy the No Thrills team a coffee to say thanks!